


HVAC Equipment Restoration and Deep Cleaning: why is the air from my air vents so weak?
What HVAC equipment restoration means
Restoration is not a quick vacuum, a scented spray, or a one minute “coil foam” job. It is a controlled, step by step cleaning process that removes impacted dirt and biological debris, restores condensate drainage, and verifies results with measurements like static pressure and airflow. Answers to your question, why is the air from my air vents so weak?
The target outcomes are simple:
- Airflow returns to a healthy level for the equipment
- The evaporator coil transfers heat correctly again
- Condensate drains reliably so water does not end up in ceilings or walls
- The blower is no longer fighting excessive static pressure
- Comfort and humidity control improve because the system is moving the right amount of air
Why a clean HVAC system matters
- Airflow is the foundation of everything
- HVAC is not only about refrigerant and burners. It is an airflow system. When airflow drops, your coil can freeze, your furnace can overheat, and your comfort falls apart.
- Dirty coils and blower wheels create restriction. Restriction forces the blower to work harder and often results in weak delivery at the vents.
- Heat transfer drops when surfaces are impacted
- Dirt on the evaporator coil acts like insulation. Instead of transferring heat efficiently, the coil struggles, run times get longer, and energy use climbs.
- On heating systems, restricted airflow increases temperature rise, triggers limit switches, and can create damaging short cycling.
- Water management failures cause real property damage
- Air conditioning produces condensate. When the drain pan, trap, or drain line is partially clogged, it often “sort of drains” until it does not.
- Once it stops, the damage can be immediate.

If your HVAC system is running longer, cooling worse, leaking water, or blowing weak airflow, there is a good chance the real issue is not the thermostat. It is restriction and contamination inside the equipment.
HVAC equipment restoration is the process of returning the system back to correct airflow, correct drainage, and correct heat transfer by cleaning the parts that actually impact performance.
This guide explains how to spot problems early, what parts need restoration, how long it takes, what it costs with Silicon Valley Comfort, and how to test airflow restrictions with static pressure. why is the air from my air vents so weak?
Local note for San Jose homeowners: I see the same patterns across Cambrian Park, Willow Glen, Campbell, and Los Gatos. A system can look fine from the outside while the evaporator coil and blower wheel are choking airflow on the inside. When that happens, comfort drops, energy use climbs, and the odds of an expensive failure go up.
Related Silicon Valley Comfort pages
How to know if your system is getting too dirty
Homeowner warning signs
- Airflow feels weaker than it used to at the vents
- Some rooms lag behind, especially on hotter San Jose afternoons
- Long run times or the system seems to never catch up
- Musty smell when the blower starts, especially after being off
- Filters load up unusually fast
- Water staining near the indoor unit, ceiling, or wall
- Mini split heads dripping or spitting water down the wall
- Coil icing or intermittent loss of cooling

Technician warning signs
- High total external static pressure
- High pressure drop across the coil or filter
- Low delivered airflow at registers
- Drain pan holds water after the cycle stops or drains slowly
- Visible debris and matted fins on the coil face
- Evidence of repeated overflow or moisture carryover inside the cabinet
Which parts of the HVAC system typically need restoration
The highest impact cleaning targets are usually inside the indoor unit and the first sections of duct connected to it. Here is the practical checklist we use in the field.
Air filter and filter rack
- Correct size and fit matters. A bypassing filter rack feeds dirt directly into the coil.
- Overly restrictive filters can reduce airflow, especially if the duct system is already tight.
Return grille and return duct
- Returns pull in hair, dust, lint, and insulation fibers.
- Heavy buildup here is often the “supply chain” feeding the blower and coil.
Evaporator coil face and fin pack
- The coil plugs from the entering air side first.
- Once the fin pack is impacted, cleaning has to be controlled and thorough or you only clean the surface and leave the restriction.
Blower wheel and blower housing
- A dirty blower wheel changes blade shape and reduces airflow.
- This is one of the most common hidden reasons for weak airflow and noisy operation.
- When airflow drops, coil icing and compressor stress become more likely.
Drain pan, trap, condensate pump, and drain line
- Slow drains become clogs. Clogs become overflows.
- Attic installations are high risk because an overflow can ruin ceilings fast.
Supply plenum and the first elbows
- If the coil has been wet and dirty for a long time, the supply side may show contamination near the unit.
Registers and grilles
- These surfaces can reintroduce dust even after the equipment is restored.
Ductwork, when justified
- Duct cleaning is not always necessary, but it can be appropriate if there is heavy buildup, construction debris, insulation fibers, or confirmed contamination.
- Any duct restoration should be done with proper containment to avoid spreading debris into living areas.
Why ‘restoration before catastrophic failure’ matters
Most “sudden” HVAC failures are not sudden. They are the end result of restriction, overheating, flooding, corrosion, or repeated nuisance trips that were ignored.
Restoration is how you interrupt that chain while the fix is still controlled.
Worst case scenarios we see when issues are ignored
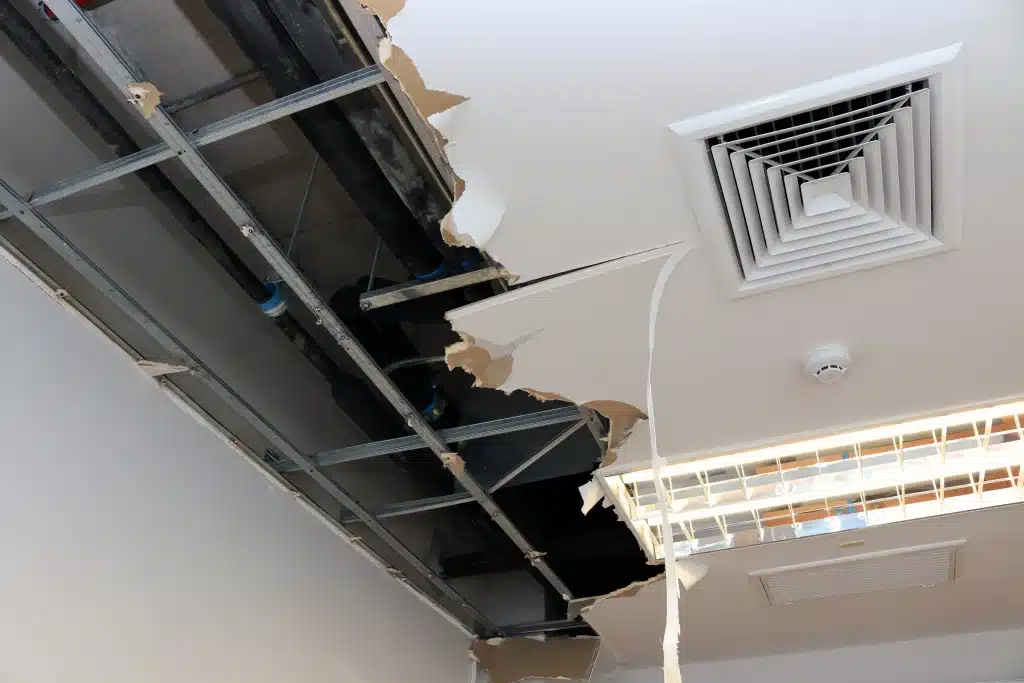
- Ceiling damage from attic units: drain clogs or pan overflows soak insulation and drywall, then you get stains, sagging, and collapse.
- Mini split wall coil leaks: biofilm and clogged drain channels cause water to drip down the wall, damaging paint, drywall, trim, and flooring.
- Evaporator coil blockage: airflow drops, coil temperature falls, icing begins, and eventually you lose cooling and risk a flood during thaw.
- Compressor failure: low airflow can contribute to poor operating conditions and long run times that stress the compressor over time.
- Furnace overheating and short cycling: restricted airflow drives high temperature rise and repeated limit trips.
- Blower motor failure: high static pressure and long run times increase heat and wear on the motor and controls.
- Cracked heat exchanger risk: repeated overheating, short cycling, and stress can contribute to heat exchanger deterioration. If a heat exchanger is suspected to be compromised, it should be addressed immediately by a qualified technician.
If your system is already showing symptoms, do not wait for a breakdown on the hottest week of summer or the coldest week of winter. Restoration is usually cheaper than emergency repair, and it reduces the odds of major component failure.
If your issue is active right now, start here: AC repair in San Jose or HVAC maintenance and system checkups.
How long HVAC restoration and deep cleaning takes
Time depends on how impacted the coil and blower are, how accessible the unit is, and whether we need containment to protect the home.
Here are realistic ranges.
Light restoration
Typical time:
Best for: early stage drain issues, moderate dust, basic airflow restriction
2 to 4 Hours
Medium restoration
Typical time:
Best for: impacted blower wheels, heavier coil loading, recurring drain problems
4 to 8 hours
Heavy restoration
Typical time:
Best for: severe coil blockage, coil removal scenarios, targeted duct restoration
8 to 16 hours or more
How much it costs for Silicon Valley Comfort to perform this service
We perform restoration as time and material.
- Labor: quoted before we start
- Parts and materials: quoted with the supplier invoice attached
Typical homeowner ranges:
- Light restoration: 2 to 4 labor hours, 320 to 640 plus minor materials
- Medium restoration: 4 to 8 labor hours, 640 to 1,280 plus materials and protective coverings
- Heavy restoration: 8 to 16 labor hours, 1,280 to 2,560 plus materials, and any approved repairs if damaged components are found
If you want a tight estimate, we inspect first and price based on access and measured restriction. Scheduling is here: Contact Silicon Valley Comfort.
How we do HVAC restoration step by step
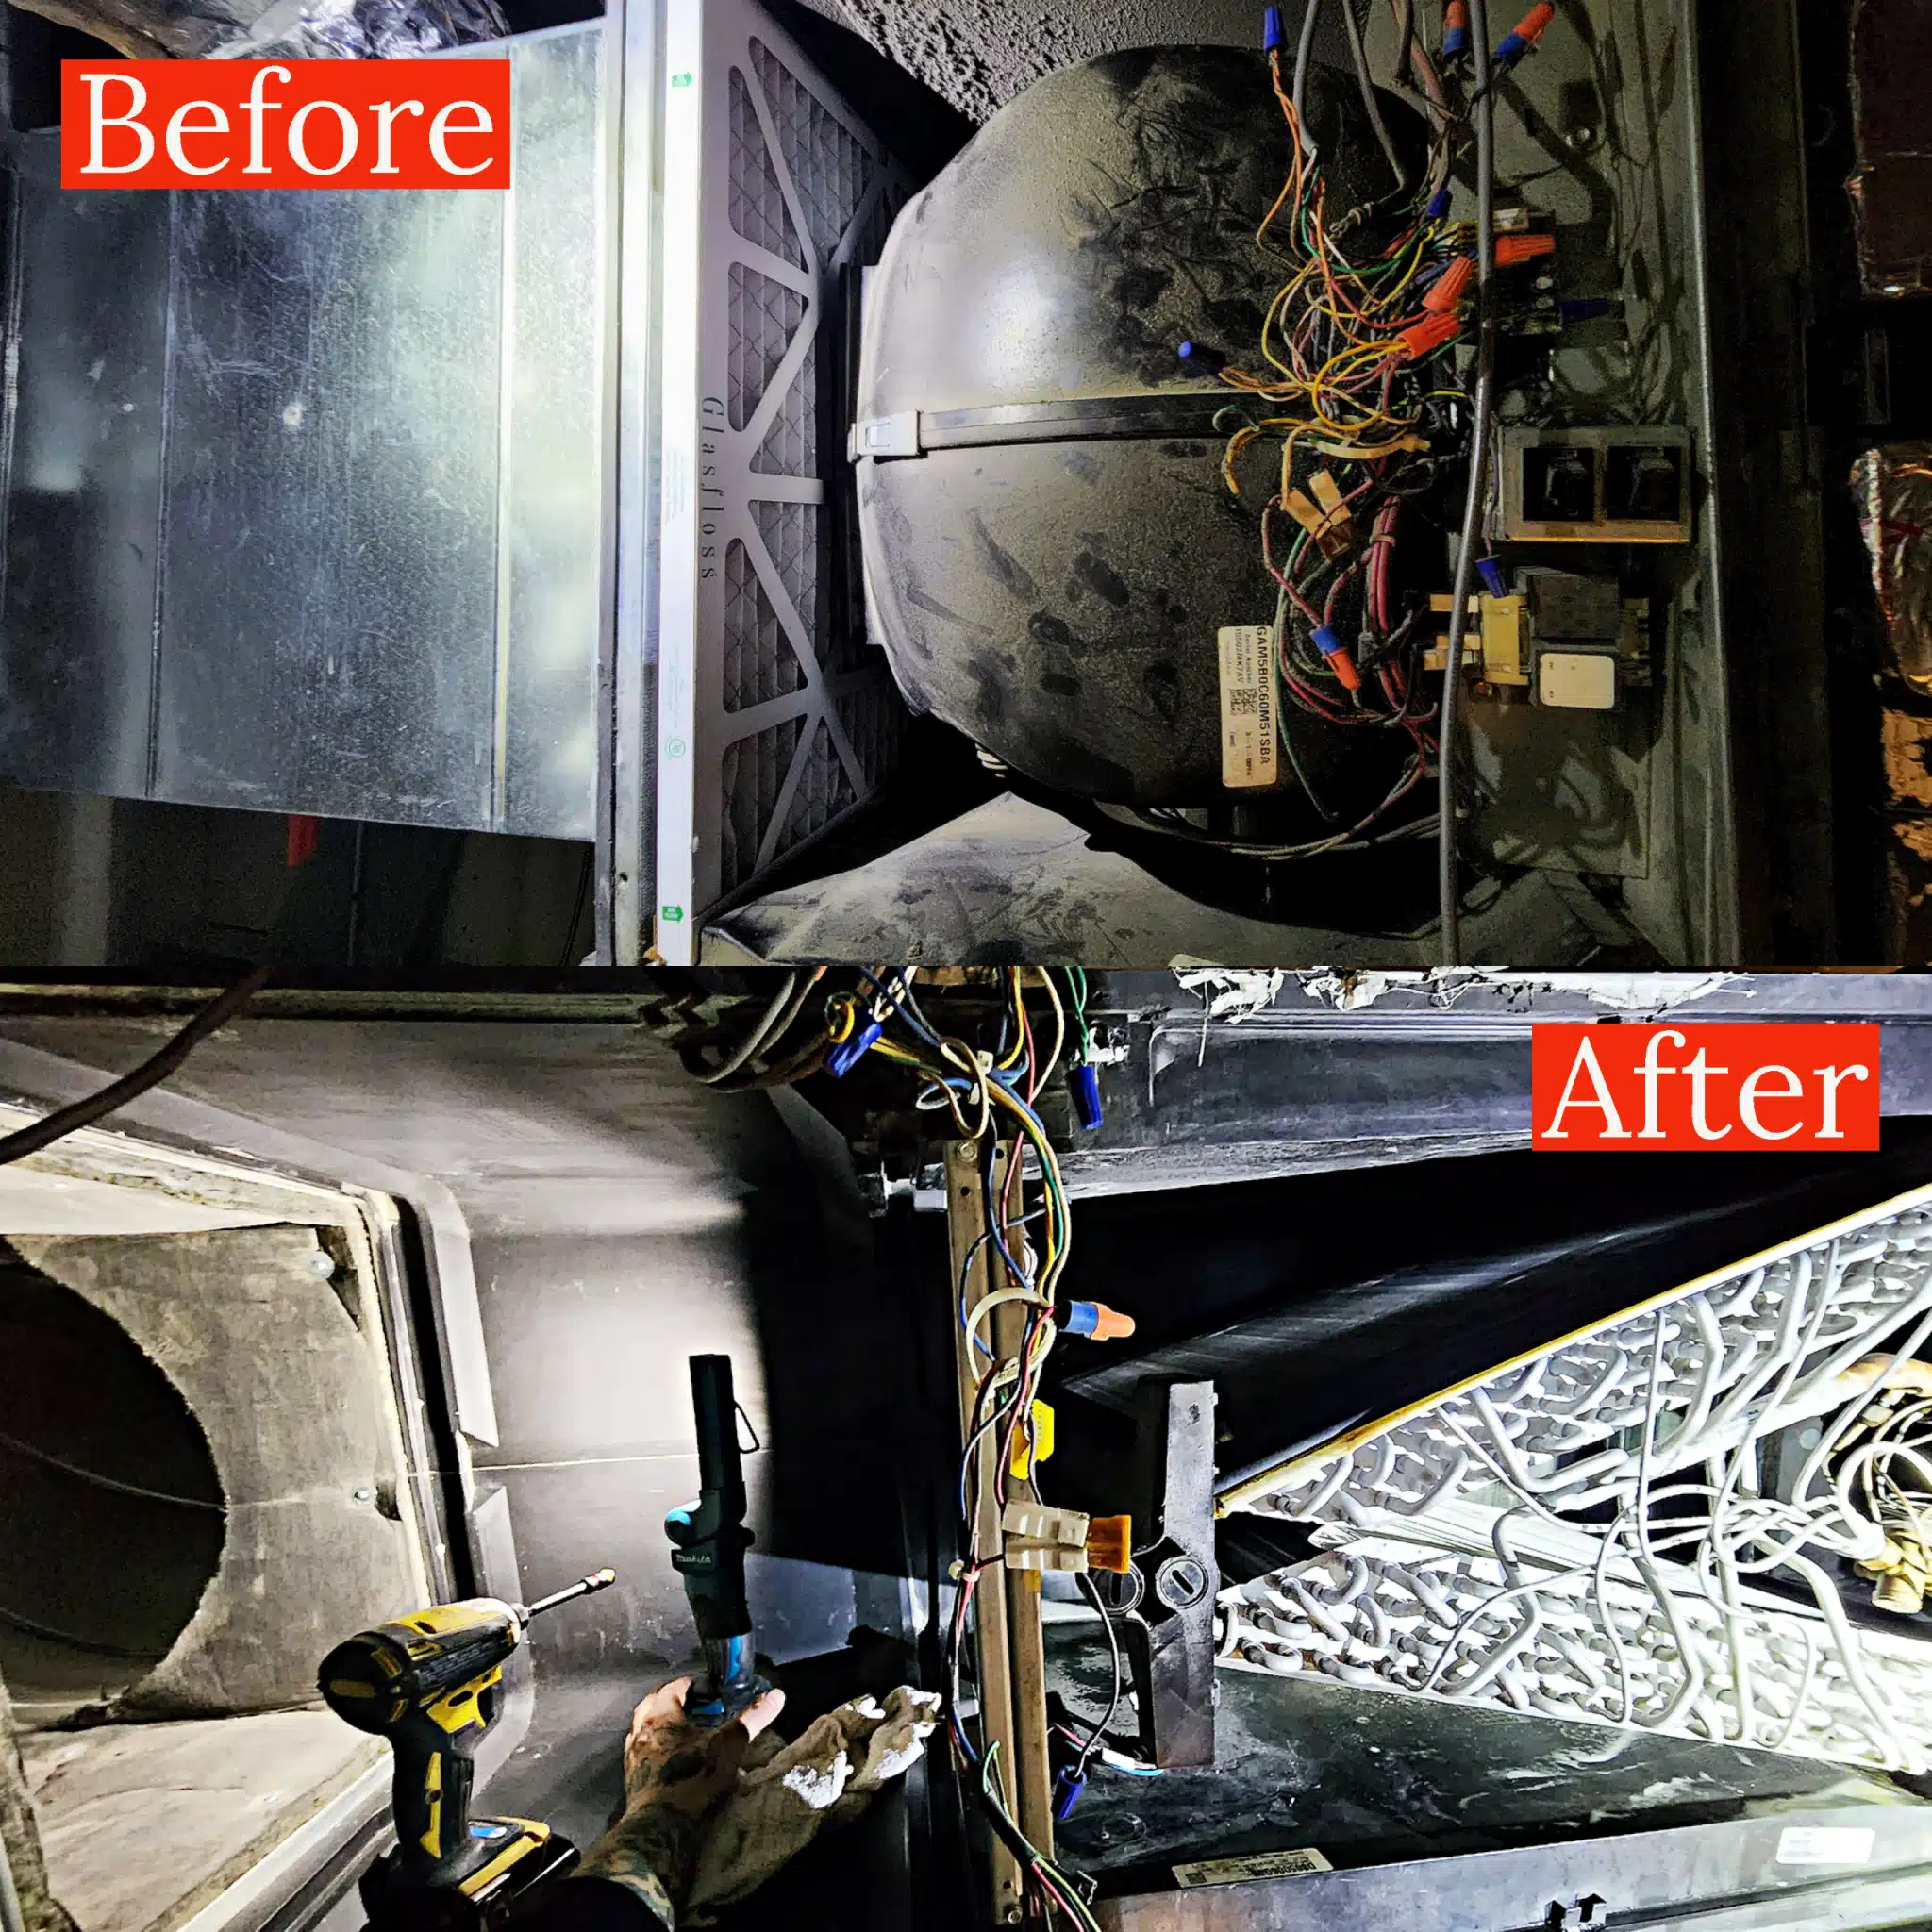
Below is the real workflow, not the simplified version. This is also the closest thing to a DIY roadmap, although deeper coil and blower cleaning can get risky fast if you do not control water and protect electrical components.
Step 1: Baseline performance checks
- Document symptoms and equipment type
- Measure static pressure profile and note delivered airflow concerns
- Confirm safe operation in heat or cool mode
- Inspect the drain system and overflow protection
Step 2: Protect the home and work area
- Cover floors and nearby finishes
- Set up wet protection under attic units when needed
- Plan for controlled water capture and drainage verification
Step 3: Restore condensate drainage first
- Clear the drain line and confirm it drains continuously
- Clean the drain pan and pan corners where sludge builds
- Inspect trap, fittings, and condensate pump operation if present
- Confirm the pan does not hold abnormal standing water after operation
Step 4: Blower wheel and cabinet restoration
- Inspect blower wheel for buildup and imbalance
- Clean in place when appropriate, or remove for full cleaning when needed
- Clean blower housing surfaces that collect debris
- Verify wheel cleanliness because partial cleaning still leaves airflow loss
Step 5: Evaporator coil inspection and cleaning
- Inspect coil face for impacted fins and matted debris
- Confirm restriction using static pressure drop and visual inspection
- Perform controlled coil cleaning with proper water capture
- Rinse thoroughly so residue is not left behind
- Confirm water sheds and drains correctly afterward
Step 6: Return path, supply plenum, and register cleaning as needed
- Clean return grilles and accessible return boxes if heavily loaded
- Clean supply registers and grilles so surfaces do not re-seed dust
- Inspect supply plenum near the unit for contamination if carryover is suspected
Step 7: Post restoration verification
- Re-test static pressure profile and compare to baseline
- Confirm improved airflow and more stable operation
- Verify drainage under real run conditions
- Document findings and recommended prevention steps
If your system also needs repairs, start with diagnostics: AC repair in San Jose.
If the system is older and replacement is on the table, review: heating installation and full services.
Static pressure testing is one of the fastest ways to separate guesses from facts. It tells you how hard the blower is working to move air through the system.
High static pressure usually means restrictions, undersized ducts, overly restrictive filters, impacted coils, or some combination.
Trusted resources
Schedule HVAC restoration in San Jose
If you suspect restriction, leakage, or declining performance, restoration is often the most cost-effective way to prevent a major breakdown.
We verify the problem with static pressure and airflow checks, restore the system, and then prove improvement with post testing.
If you are dealing with active leaks, icing, or repeated shutoffs, that is when restoration and measured verification is worth paying for.
How often does HVAC restoration need to be done?
Most homes do not need heavy restoration regularly. The need depends on filtration quality, duct leakage, indoor air quality, pets, and how quickly the coil and blower load up.
The best approach is measurement and inspection during maintenance, then restore only when restriction and contamination justify it.
Will coil cleaning always improve performance?
If the coil is impacted and restricting airflow, restoration usually improves airflow and heat transfer. If the main problem is undersized ducts or a design issue, coil cleaning may help but will not fully solve the root cause. Static pressure testing clarifies which it is.
Why is my attic unit leaking even though the drain line looks clear?
Common reasons include partial clogs that only show up under real flow, a mis-pitched drain, a failing condensate pump, a cracked pan, a blocked trap, or a coil that is holding water and shedding unevenly. The correct fix starts with verifying drainage under operation.
Why do mini split heads drip water down the wall?
Biofilm buildup in the drain channel, restricted drainage, or a dirty coil can cause water to spill out the front instead of draining. Mini splits often need periodic deep cleaning of the indoor head components, not just a quick filter rinse.
Can a dirty blower wheel really cause big problems?
Yes. A dirty wheel reduces airflow, increases static pressure stress, and can contribute to coil icing and furnace overheating. It is one of the most underestimated causes of poor performance.
What is the fastest way to know if my coil is restricted?
Static pressure drop across the coil is a strong indicator. Visual inspection helps, but pressure testing is objective and repeatable, and it lets you confirm improvement after cleaning.
Do you service San Jose neighborhoods like Cambrian Park and Willow Glen?
Yes. We serve San Jose and nearby areas including Cambrian Park, Willow Glen, Campbell, and Los Gatos. Scheduling is here: Contact Silicon Valley Comfort.